
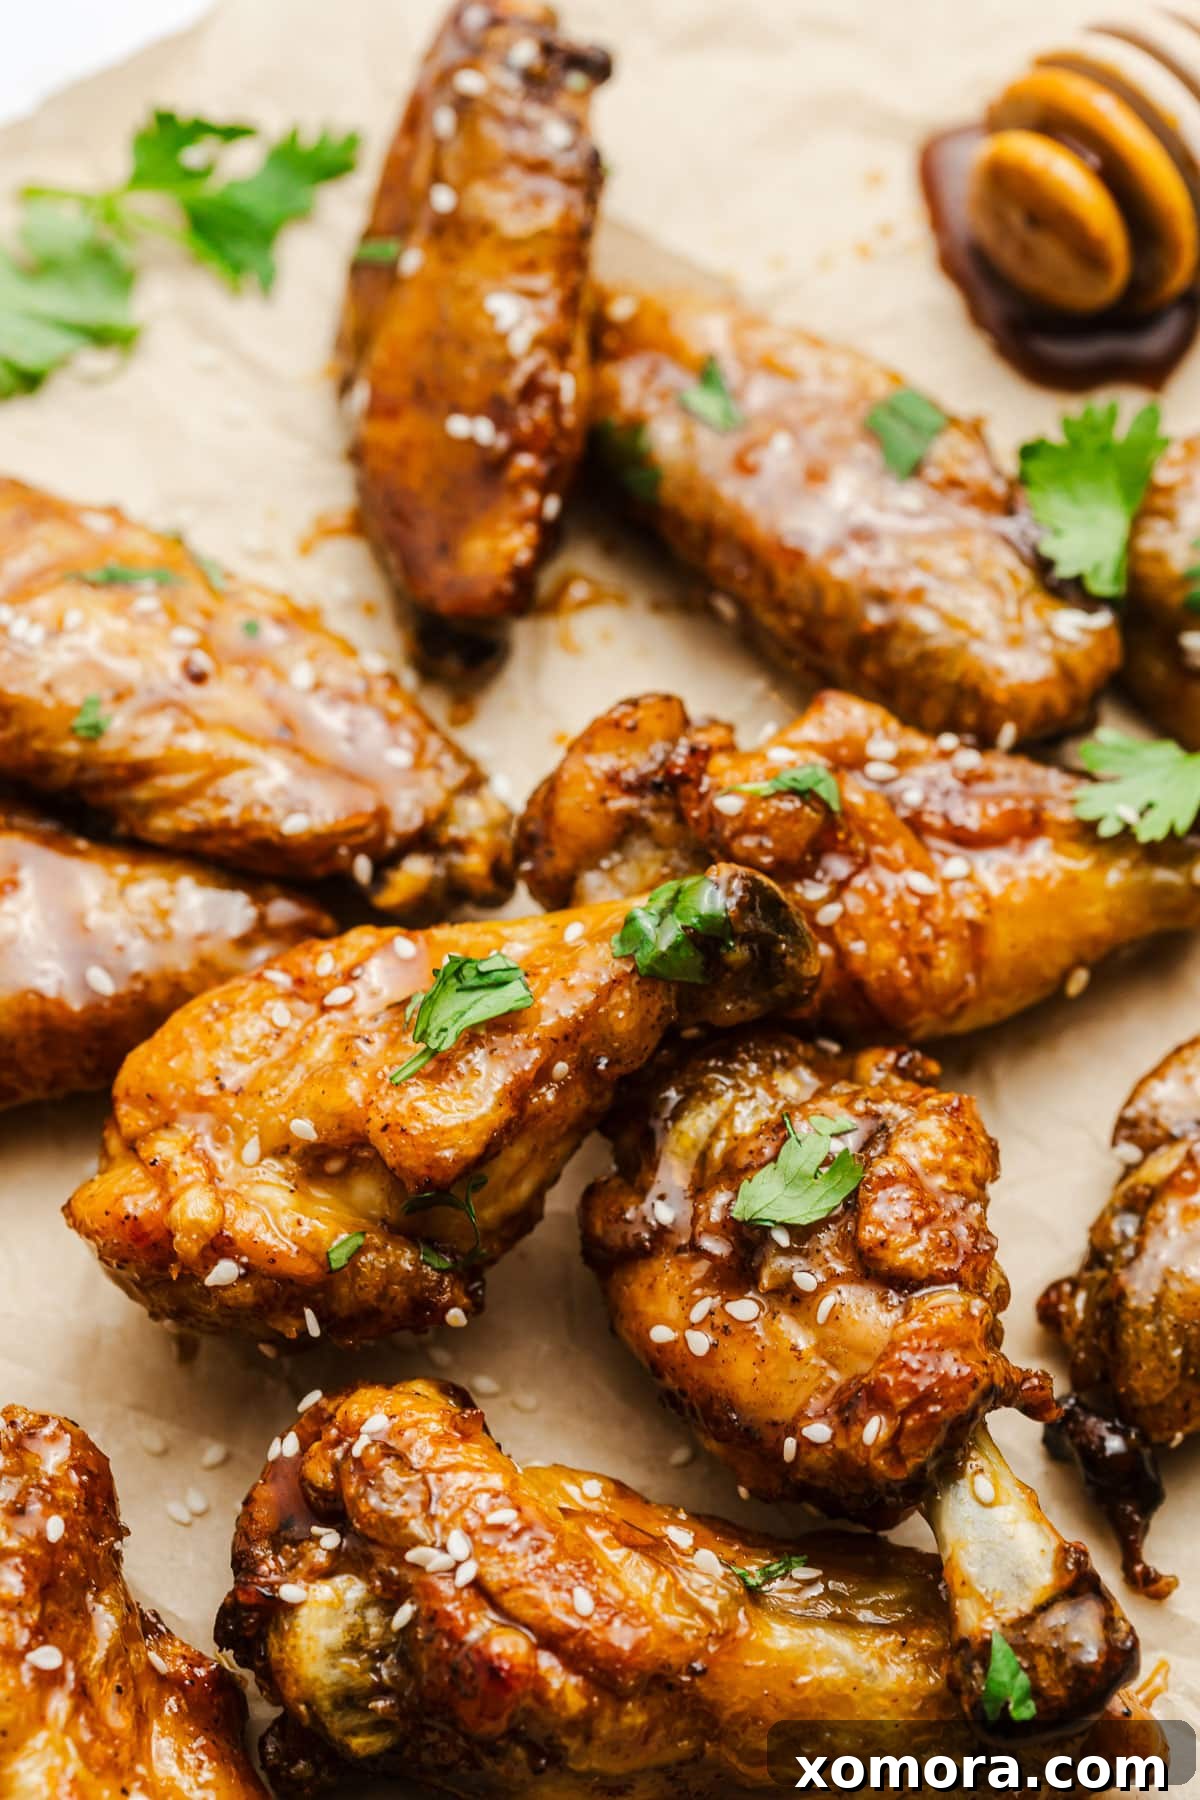
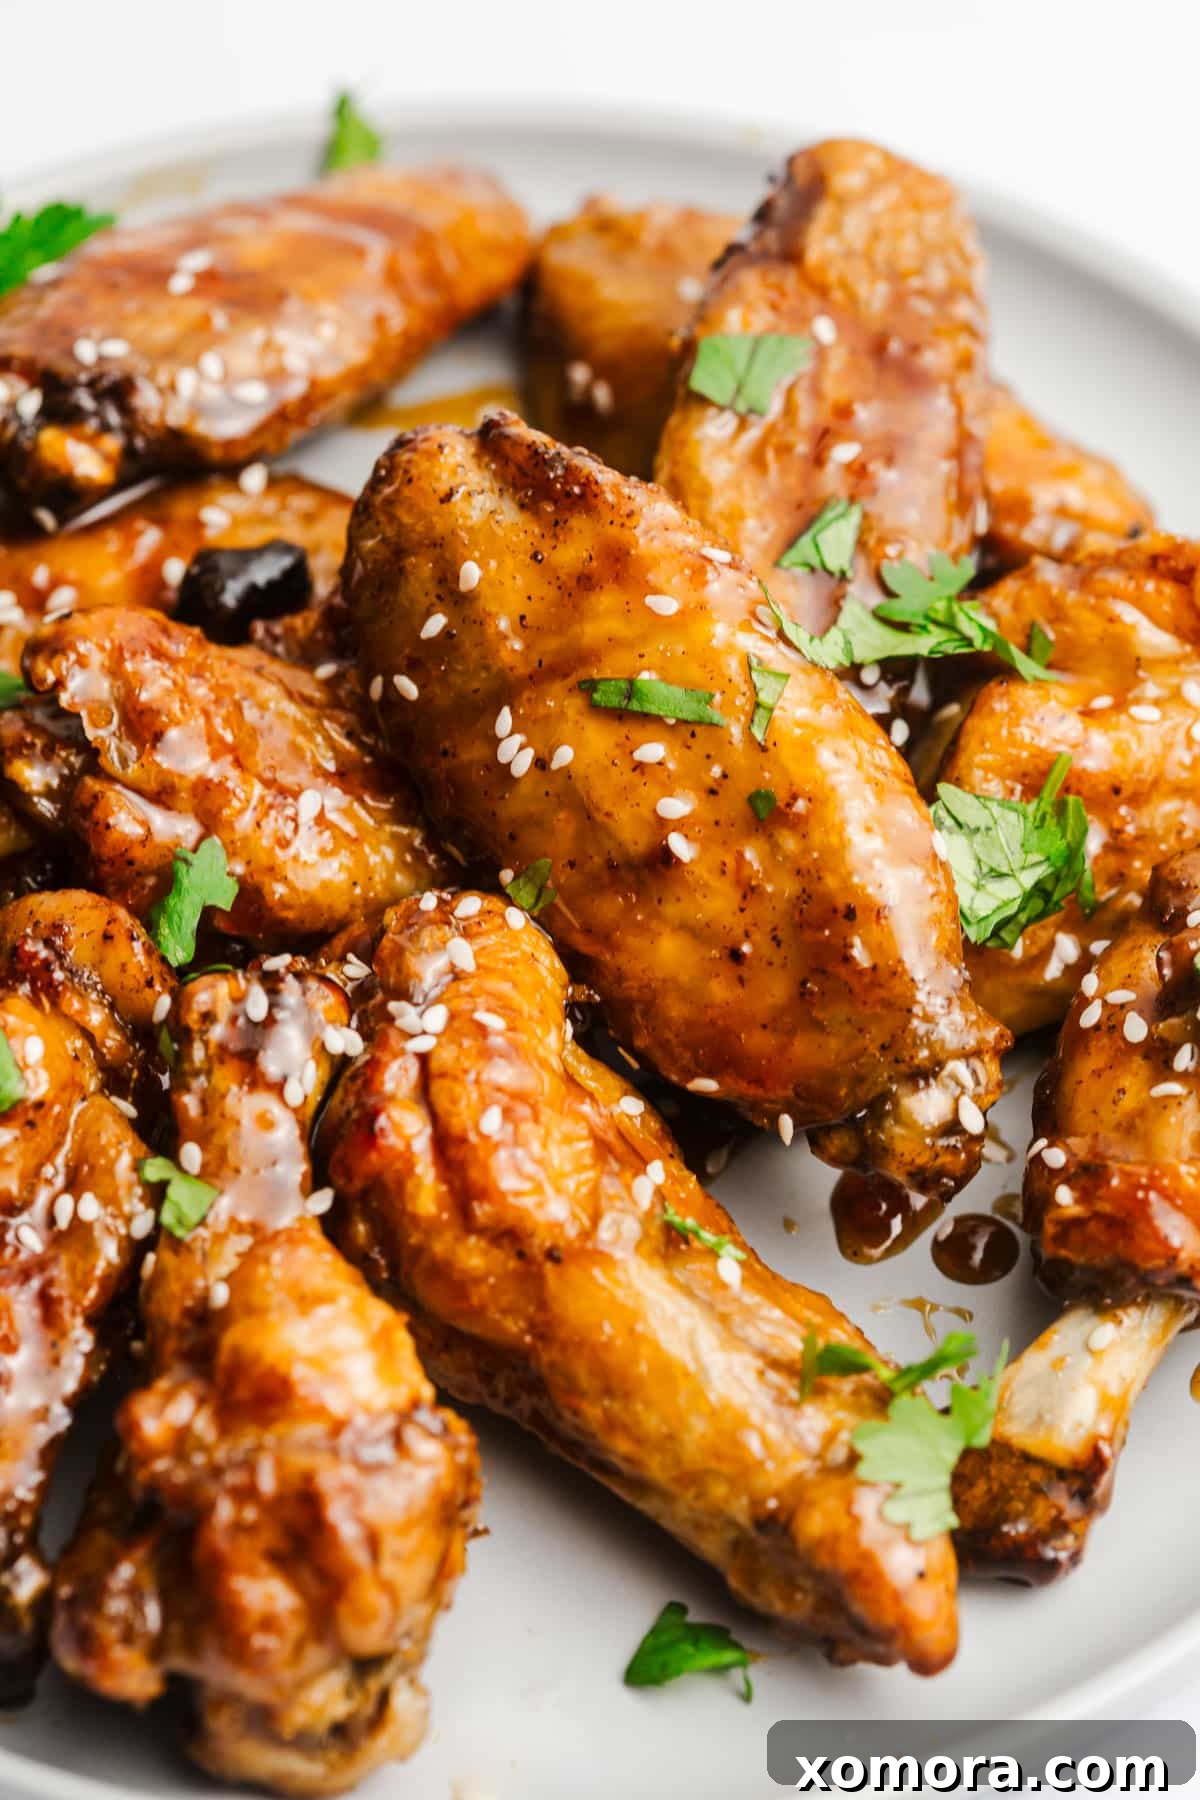
Prepare to tantalize your taste buds with these incredibly crispy baked chicken wings, generously coated in an effortlessly delicious 4-ingredient honey garlic sauce! Whether you’re seeking a show-stopping appetizer, a satisfying snack, or a delightful entree, these sticky, savory-sweet wings promise a finger-licking experience that will have everyone reaching for more.
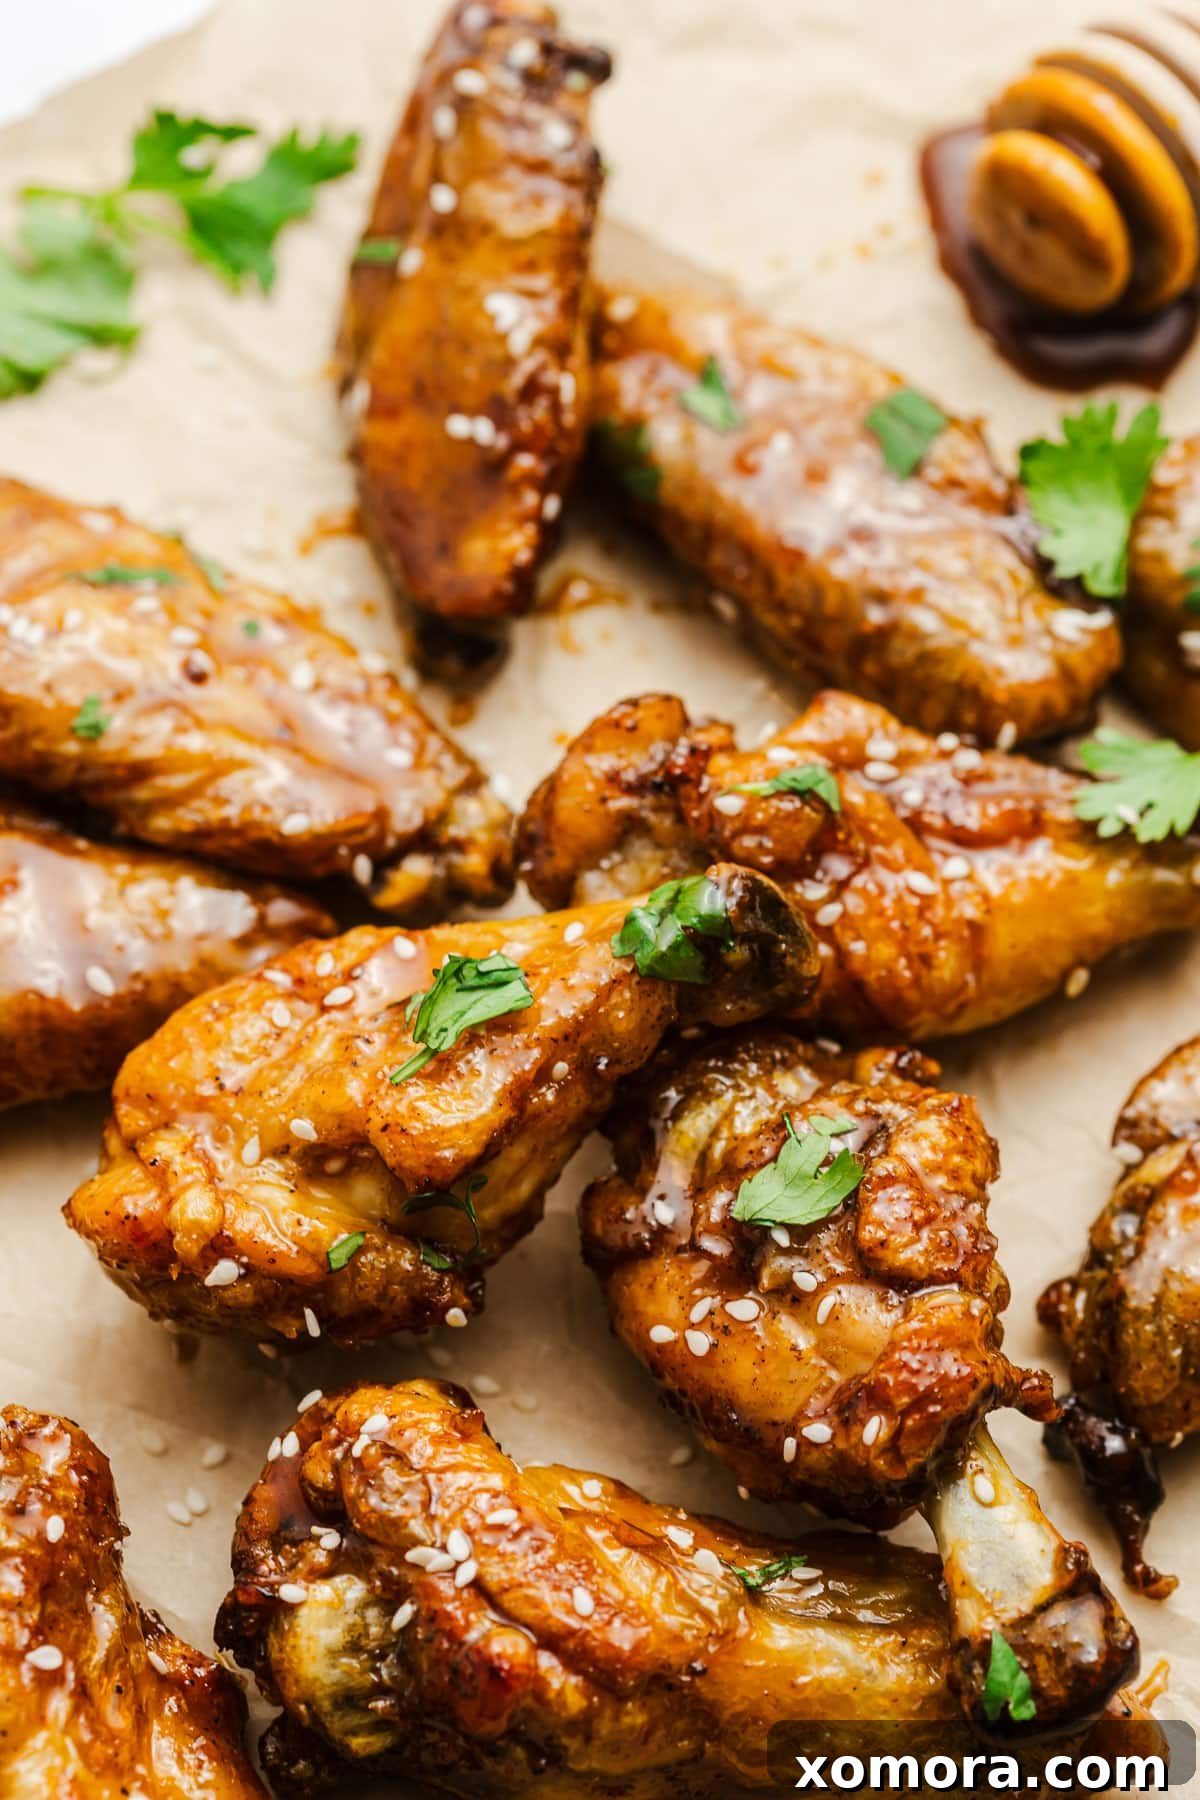
Update: This recipe, a family favorite, was originally shared in 2021 and has since been updated with fresh photos and enhanced details to ensure your baking success.
Why You’ll Fall in Love with These Baked Honey Garlic Wings
As a seasoned cook catering to a household full of wing enthusiasts, I’ve mastered the art of creating irresistible sauces and perfecting cooking methods. While the allure of deep-fried wings is undeniable, my preference leans heavily towards baking. It’s not just a healthier alternative; it’s a game-changer for achieving that sought-after crispy skin without the mess and fuss of a deep fryer. If you’ve ever doubted the potential of baked wings, prepare to be converted! I’m here to equip you with all the expert tips and tricks to guarantee every single wing is juicy on the inside, wonderfully crispy on the outside, and bursting with phenomenal flavor.
The real magic happens when these perfectly baked wings meet our simple, yet profoundly flavorful, honey garlic sauce. Crafted from just four core ingredients, this sauce transforms ordinary chicken into an extraordinary culinary delight. It’s so good, you’ll be excused for licking every last drop off your fingers – in fact, I highly encourage it!
These homemade chicken wings are incredibly versatile and pair beautifully with a variety of sides. For a quick and easy meal, I often serve them alongside Air Fryer Frozen Sweet Potato Fries, classic Air Fryer Frozen French Fries, or my comforting Roasted Potato Wedges. Their sticky, savory profile also makes them a fantastic addition to any game day spread or casual gathering.
Essential Ingredients for Irresistible Baked Honey Garlic Chicken Wings
Creating these delightful wings requires a handful of accessible ingredients, split between the chicken and its seasonings, and the star of the show: the honey garlic sauce.
- Chicken Wingettes (or Split Wings): For optimal cooking and ease of eating, I highly recommend using split wings or pre-cut chicken wingettes. Whole wings can be quite large and take longer to cook evenly. Look for fresh, high-quality chicken for the best results.
- Pure Honey: This is the backbone of our sweet and sticky sauce. Honey provides a rich, natural sweetness and helps create that desirable glossy, caramelized coating. Any good quality honey will work wonders here.
- Soy Sauce or Coconut Aminos: To balance the sweetness and introduce an umami depth. Low sodium soy sauce is an excellent choice. For those avoiding soy or looking for a lower sodium option, coconut aminos are a fantastic substitute. They offer a subtly sweet and savory flavor profile, similar to soy sauce, but with significantly less sodium and are soy-free.
- Minced Garlic: Fresh garlic is always preferred for its pungent aroma and vibrant flavor. You can mince your own cloves or use good quality pre-minced garlic from a jar for convenience.
- Simple Seasonings: A blend of garlic powder, a pinch of cayenne pepper, salt, and black pepper forms the foundational flavor for the chicken itself. These seasonings enhance the natural taste of the chicken and contribute to a well-rounded final dish. The cayenne pepper offers a subtle warmth that complements the sweetness without overpowering it.
Step-by-Step Guide: How to Make Perfect Baked Honey Garlic Chicken Wings
Follow these straightforward steps to create crispy, flavorful honey garlic chicken wings right in your own kitchen.
- Prepare the Oven and Wings: Begin by preheating your oven to a high temperature of 450°F (232°C). This high heat is crucial for achieving that coveted crispy skin. While the oven heats, thoroughly pat your chicken wings dry with paper towels. Removing excess moisture is a critical step for crispiness, so don’t skip it!
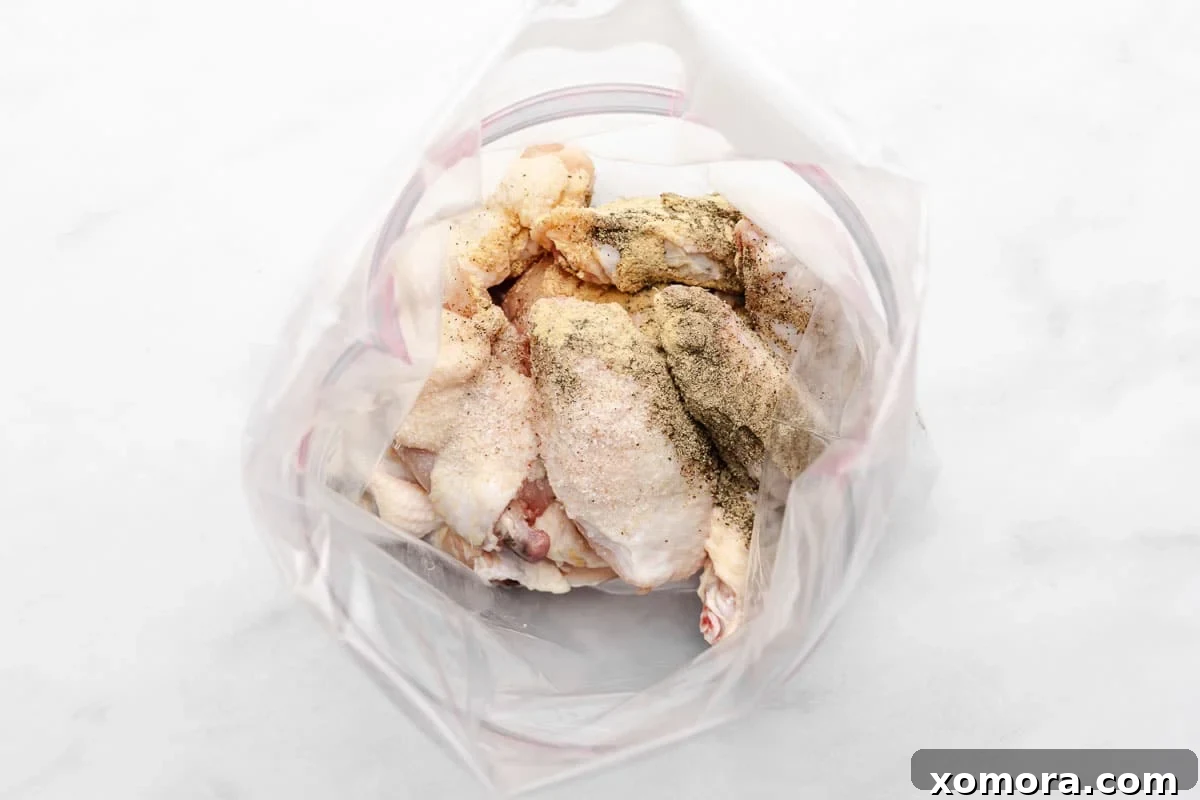
- Season the Chicken: Transfer the dried chicken wings into a large resealable bag or a sturdy container with a lid. Add the salt, black pepper, and garlic powder. Seal the bag or container and shake vigorously until each wing piece is evenly coated with the seasonings.
- Arrange for Baking: Line a large baking sheet with aluminum foil for easier cleanup. Place a wire rack (like a cooling rack used for cookies) over the foil-lined baking sheet. Arrange the seasoned chicken wings on the wire rack in a single layer, ensuring that no pieces are touching. This spacing allows for optimal air circulation, which is key to even cooking and crisping.
- Bake to Crispy Perfection: Bake the wings in the preheated oven for 30 minutes. After this initial bake time, carefully flip each wing to ensure both sides get golden and crispy. Continue baking for an additional 20 minutes, or until the chicken is thoroughly cooked through, golden brown, and delightfully crispy. Remove from the oven and set aside while you prepare the sauce.
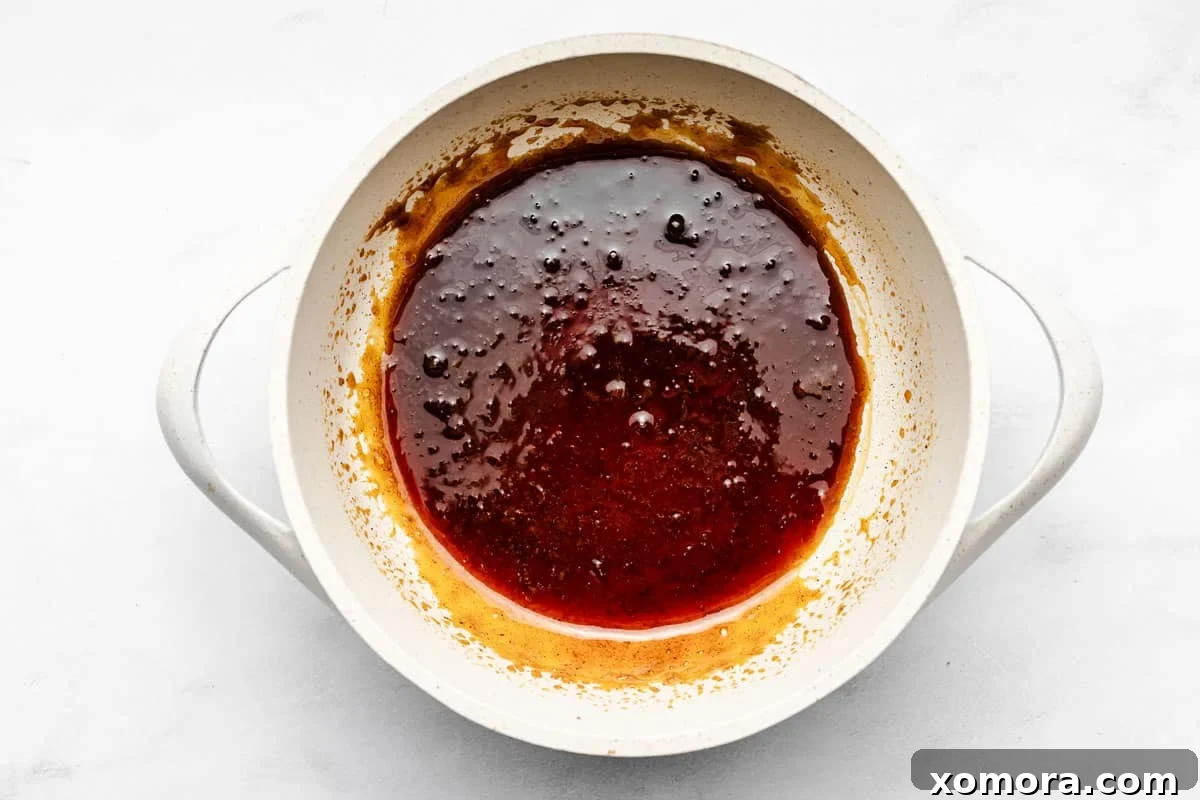
- Craft the Honey Garlic Sauce: While your chicken wings are baking, it’s time to prepare the sticky honey garlic sauce. In a small saucepan or pot, combine the honey, soy sauce (or coconut aminos), minced garlic, and cayenne pepper. Place the pot on the stovetop over medium-high heat and bring the mixture to a boil.
- Simmer and Thicken the Sauce: Once the sauce is boiling, reduce the heat to medium-low. You should still see gentle bubbles, indicating a simmer. Allow the sauce to simmer for 5 to 10 minutes, stirring occasionally, until it visibly thickens to a consistency that coats the back of a spoon. Remove the sauce from the heat and let it cool for a minute or two. It will continue to thicken slightly as it cools.
- Toss and Serve: Transfer the hot, baked chicken wings into a large mixing bowl. Pour the prepared honey garlic sauce over the wings. Toss gently but thoroughly until every wing is beautifully coated in the glossy, sticky sauce. For an extra touch of elegance, especially if you’re entertaining, you can garnish the coated wings with a sprinkle of sesame seeds or fresh chopped herbs like parsley or cilantro (both are optional but add visual appeal). Serve immediately and enjoy!
Choosing the Right Chicken Wings for Optimal Results
When you’re at the grocery store, you might notice different types of chicken wing cuts. While you can certainly buy whole chicken wings, I highly recommend opting for chicken wingettes or split wings. Why? Whole wings are typically quite large, encompassing the drumette, flat, and tip. Most restaurants serve wings that have already been broken down into the smaller, more manageable drumettes and flats (wingettes or split wings). These smaller pieces are not only easier to eat but also cook more evenly and get crispier faster. If you buy whole wings, you can easily separate them yourself at the joint.
Achieving Unbeatable Crispy Baked Wings: Expert Tips
The myth that baked wings can’t be as crispy as fried ones is simply untrue! With a few simple techniques, you can achieve incredibly crispy baked chicken wings every single time. Here are my top five tips:
- Pat Your Wings Dry — Meticulously: This is arguably the most crucial step. Excess moisture on the chicken skin turns into steam in the oven, preventing the skin from crisping up. By thoroughly patting the wings dry with paper towels, you allow the skin to directly contact the hot air, leading to a much crispier result.
- Hold the Sauce Until the End: Resist the urge to toss your wings in the sauce before baking. Applying sauce too early will make the wings soggy and prevent the skin from crisping. The sauce should only be added after the wings are fully cooked and have achieved their maximum crispiness.
- Utilize a Wire Rack and Baking Sheet: Never place your wings directly on a baking sheet. Using a wire rack elevated over an aluminum foil-lined baking sheet is essential. This setup allows hot air to circulate completely around each wing, ensuring even cooking and crisping on all sides, including the bottom. The foil-lined sheet also catches drips, making cleanup a breeze.
- Bake at High Heat: A high oven temperature is non-negotiable for crispy baked wings. I bake mine at a scorching 450°F (232°C). This intense heat rapidly renders the fat in the skin and promotes the Maillard reaction, which is responsible for that desirable golden-brown color and irresistible crunch.
- Flip Halfway Through: To ensure both the top and bottom of your wings get equally crispy, make sure to flip them about halfway through the baking time. This guarantees an even cook and consistent crispiness all around.
Mastering the Sticky-Sweet Honey Garlic Sauce: Consistency is Key
A good honey garlic sauce is all about achieving that perfect sticky consistency – not too thin, not overly thick. It’s a delicate balance, and I’ve seen many struggle with it. Some end up with a watery sauce, while others overcook it to the point of becoming a hard, sugary glaze. Don’t worry, I can help you nail it every time!
After combining all your sauce ingredients in a small pot, bring them to a rolling boil over medium-high heat. As soon as it boils, reduce the heat to medium-low. The key is to maintain a gentle simmer where you see small, consistent bubbles, but not a vigorous boil that threatens to overflow the pot. Let it simmer, uncovered, for about 5 to 10 minutes. The exact time will depend on your stove and pot size. You’ll know it’s ready when it coats the back of a spoon without running off immediately. Remember, the sauce will continue to thicken as it cools, so don’t be tempted to overcook it on the stove. Pull it off the heat and let it rest for a minute or two before tossing with the hot wings.
Customizing the Heat: Is Your Honey Garlic Sauce Spicy?
The base recipe for this honey garlic sauce is designed to be mildly flavored, leaning more towards sweet and savory. You might detect a slight warmth from the cayenne pepper, but the generous amount of honey beautifully balances it out, preventing any overwhelming spice. The recipe calls for just ¼ teaspoon of cayenne pepper, which is enough to add depth without heat. However, if your family, like mine, enjoys a bit more kick in their wings, feel free to double the cayenne pepper to ½ teaspoon. This adjustment provides a noticeable, pleasant heat that perfectly complements the sweetness, making the wings even more dynamic. Always feel free to adjust the spice level to suit your personal preference!
Serving Suggestions and Perfect Pairings
While these honey garlic wings are fantastic on their own, pairing them with the right sides can elevate your meal. Here are some ideas:
- Crispy Fries: As mentioned, both regular and sweet potato fries (especially air-fried for convenience) are classic companions.
- Roasted Vegetables: Roasted broccoli, asparagus, or bell peppers add a healthy and colorful contrast. Their slight char complements the sticky wings.
- Rice: A simple bed of fluffy white rice or flavorful fried rice can help soak up any extra sauce, making for a more substantial meal.
- Coleslaw or Salad: A refreshing, crisp coleslaw or a light green salad with a vinaigrette dressing offers a cooling counterpoint to the rich, savory wings.
- Corn on the Cob: Sweet corn, grilled or boiled, is a delightful addition to any casual wing feast.
Storing Leftover Honey Garlic Wings: Freshness & Reheating Tips
For the ultimate taste and texture, these chicken wings are truly best enjoyed fresh out of the oven, when the sauce is perfectly sticky and the skin is at its crispiest. For this reason, I always recommend making just enough to devour in one sitting – yes, I’m giving you permission to eat all the wings! However, if you do find yourself with leftovers, they can be stored in an airtight container in the refrigerator for up to 3-4 days.
To reheat leftover wings and bring back some of that original crispiness, avoid the microwave if possible, as it tends to make them soggy. The best methods are:
- Oven: Preheat your oven to 375°F (190°C). Arrange the wings on a wire rack over a baking sheet and heat for about 10-15 minutes, or until warmed through and the skin begins to crisp again.
- Air Fryer: This is a fantastic option for reheating! Place the wings in a single layer in your air fryer basket and cook at 350°F (175°C) for 5-8 minutes, shaking the basket halfway, until they are hot and crispy.
Frequently Asked Questions about Baked Honey Garlic Wings
Q: Can I use frozen chicken wings for this recipe?
A: Yes, you can. However, you must thaw them completely before preparing. Pat them extra dry after thawing to ensure maximum crispiness.
Q: Can I prepare the sauce ahead of time?
A: Absolutely! The honey garlic sauce can be made a day or two in advance and stored in an airtight container in the refrigerator. Reheat gently on the stovetop or in the microwave before tossing with the freshly baked wings.
Q: How can I make these wings even crispier?
A: Beyond the tips mentioned, some people add a small amount of baking powder (not baking soda) to the dry seasoning mix for the chicken. About 1 teaspoon per 2 pounds of wings can help draw out moisture and promote extra crispiness. Make sure it’s aluminum-free baking powder to avoid any metallic taste.
Q: Can I use an air fryer instead of baking?
A: Yes, these wings can be adapted for the air fryer! Follow the same seasoning and saucing steps. Air fry at 380°F (195°C) for 20-25 minutes, flipping halfway, until golden and crispy. Cooking time may vary based on your air fryer model.
Baked Honey Garlic Chicken Wings
By Christina
These crispy baked wings are tossed in an easy 4-ingredient honey garlic sauce! They’re sticky and delicious as an appetizer, snack, or entree.
Servings: 15 wings
Ingredients
Chicken Wings
- 1½ – 2 pounds chicken wingettes, wings, or split wings
- ½ teaspoon salt
- ½ teaspoon black pepper
- ½ teaspoon garlic powder
Honey Garlic Sauce
- ½ cup honey
- ¼ cup coconut aminos or low sodium soy sauce
- 1 tablespoon garlic, minced
- ¼ teaspoon cayenne pepper (If you want more heat, use ½ tsp.)
Instructions
- Preheat oven to 450 degrees F (232°C).
- Pat chicken wings dry with a paper towel. This is an important step to achieving crispy wings so don’t skip it!
- Toss chicken in a large ziplock bag or sealed container with salt, pepper, and garlic powder. Shake so each wing is fully covered with the seasonings.
- Place wings on a wire rack over an aluminum foil lined baking sheet so that the sides of the chicken don’t touch. Bake for 30 minutes. Flip wings. Bake for 20 additional minutes. Remove from oven when cooked through and golden brown.
- While chicken is baking, add all Honey Garlic Sauce ingredients to a small pot or saucepan on the stovetop. Bring to a boil on medium-high heat. Then drop the heat to medium-low. You should continue to see some bubbles. Simmer for 5 to 10 minutes or until sauce has thickened. Let your sauce cool for a minute or two before adding to the chicken. It will continue to thicken as it sits.
- Toss the baked chicken wings in your finished Honey Garlic Sauce to evenly coat. Top with sesame seeds or fresh herbs (both are optional) if you’re entertaining and want to make these wings look extra special.
Nutrition
Serving: 1 wing, Calories: 94kcal, Carbohydrates: 10g, Protein: 5g, Fat: 4g, Saturated Fat: 1g, Trans Fat: 1g, Cholesterol: 19mg, Sodium: 186mg, Potassium: 49mg, Fiber: 1g, Sugar: 9g, Vitamin A: 50IU, Vitamin C: 1mg, Calcium: 5mg, Iron: 1mg
Nutrition information is automatically calculated, so should only be used as an approximation.